Get Push Notifications for Every Zabbix Problem
Connect Zabbix directly to Pushinator with a Webhook media type and get instant push notifications when a problem starts or resolves.
What You Can Build
Problem & Resolved Alerts
Severity-Aware
No Dashboard Checking
Flexible Routing
Set It Up in Minutes
Zabbix has no app or plugin to install — Pushinator generates a ready-to-paste webhook script, and Zabbix sends problems directly to it.
Create a channel and a Zabbix webhook
Log in to the Pushinator Console and create a channel (e.g., "Zabbix Alerts"), or open an existing one.
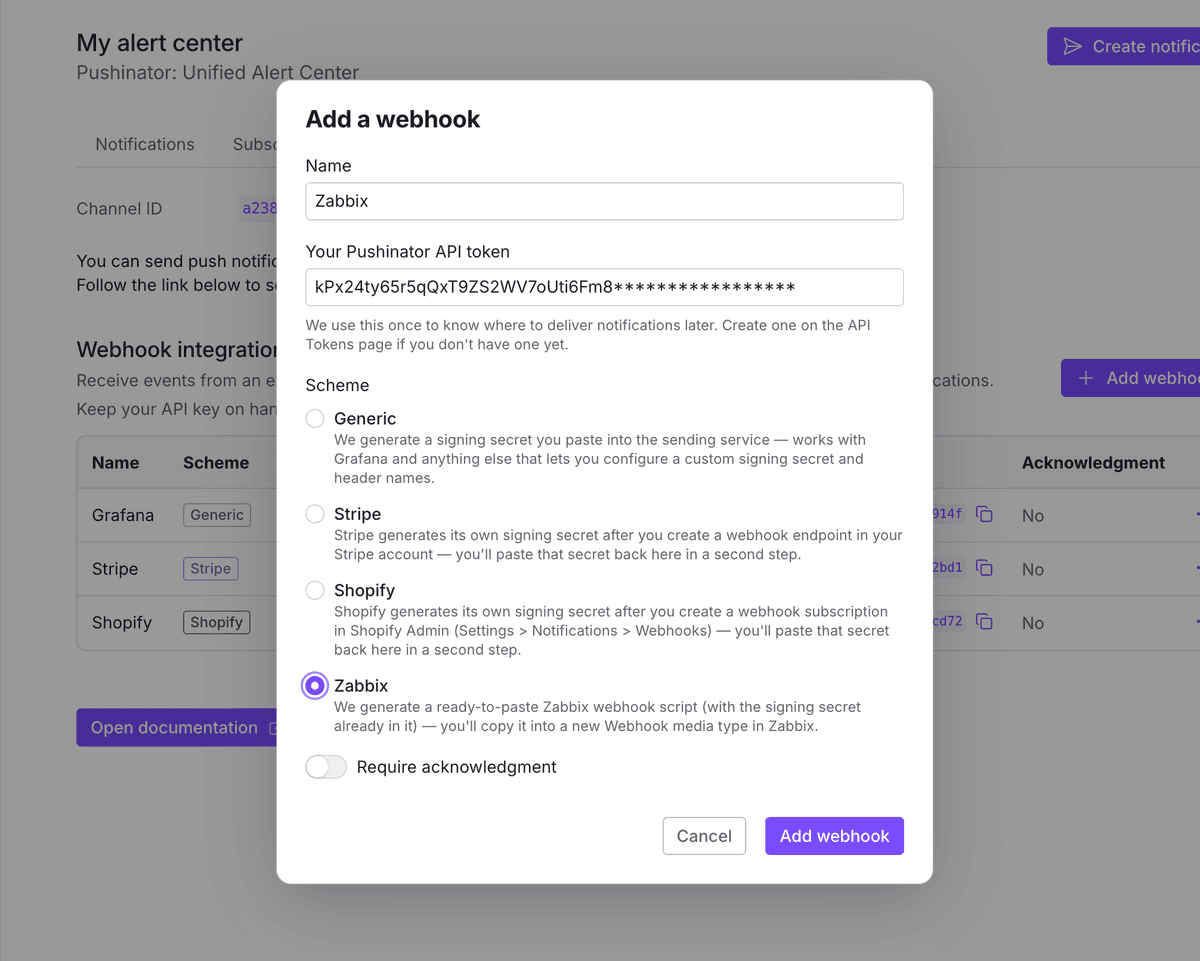
Open the channel's API & Integrations tab, click Add webhook, give it a name, and set the scheme to Zabbix, then submit.
Copy the generated script and parameters
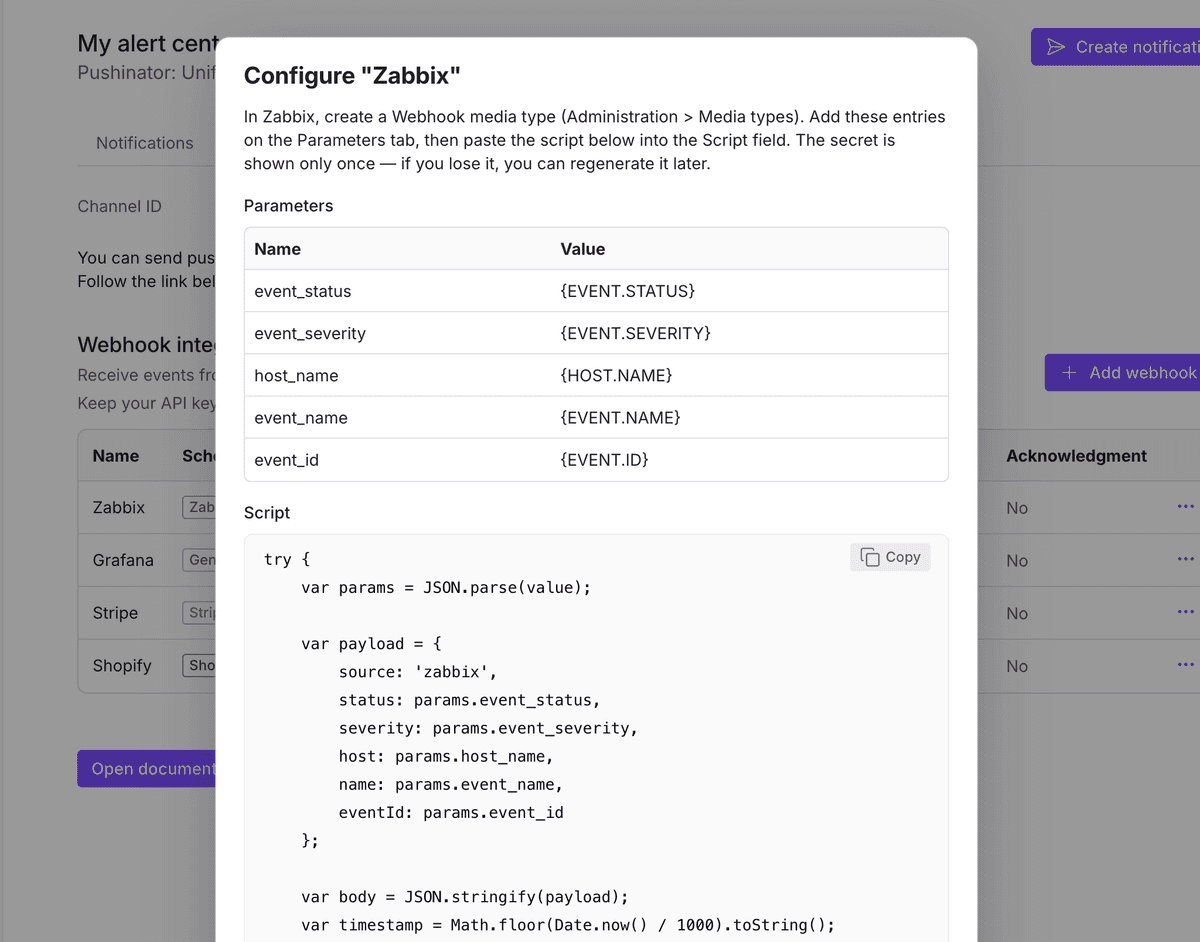
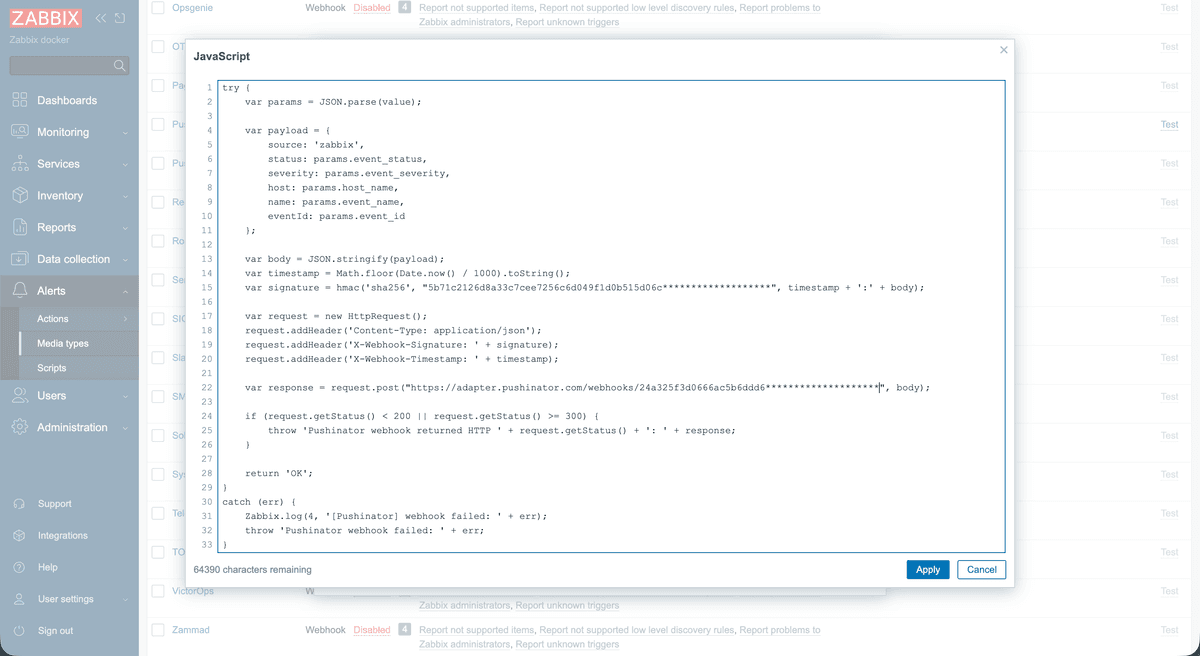
Pushinator immediately shows a table of Parameters and a ready-to-paste Script with your signing secret already baked in - unlike Grafana or a generic webhook, there's no separate secret to copy: Zabbix has no signing convention of its own, so the script itself handles it. Copy both, you'll paste them into Zabbix next.
Create a Webhook media type in Zabbix
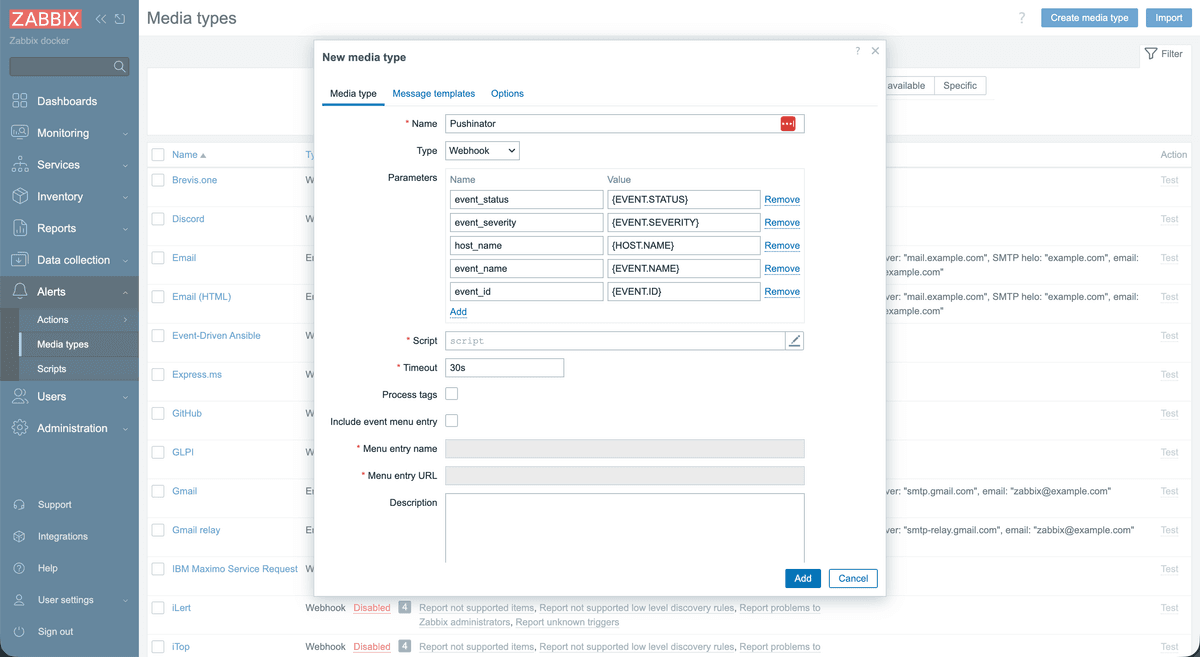
In Zabbix, go to Alerts → Media types → Create media type, give it a name (e.g., "Pushinator"), and set Type to Webhook.
On the Parameters tab, add the entries Pushinator gave you — the values are Zabbix macros like {EVENT.STATUS}, which Zabbix fills in for every real problem.
On the Script tab, paste the script Pushinator generated.
Before saving, add a Message templates entry for both Problem and Problem recovery — this isn't a Pushinator-specific quirk: Zabbix requires a template to exist for every operation type a media type is used for, no matter which media type it is. It's easy to skip for a webhook, since our script never reads the subject or message, but Zabbix still refuses to send anything without one. The subject and message text don't matter — anything non-empty works.
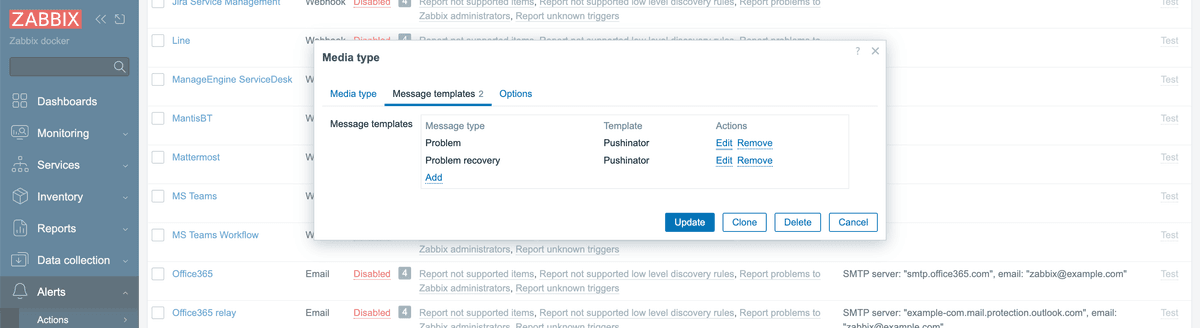
Save the media type, then use the Test button from the media types list to confirm it works before moving on.
Assign the media type to a user
Go to Users → Users, open a user, and go to the Media tab. Click Add and pick the media type you just created. Zabbix still requires a value in Send to even though the script doesn't use it — your username or something like pushinator works fine.
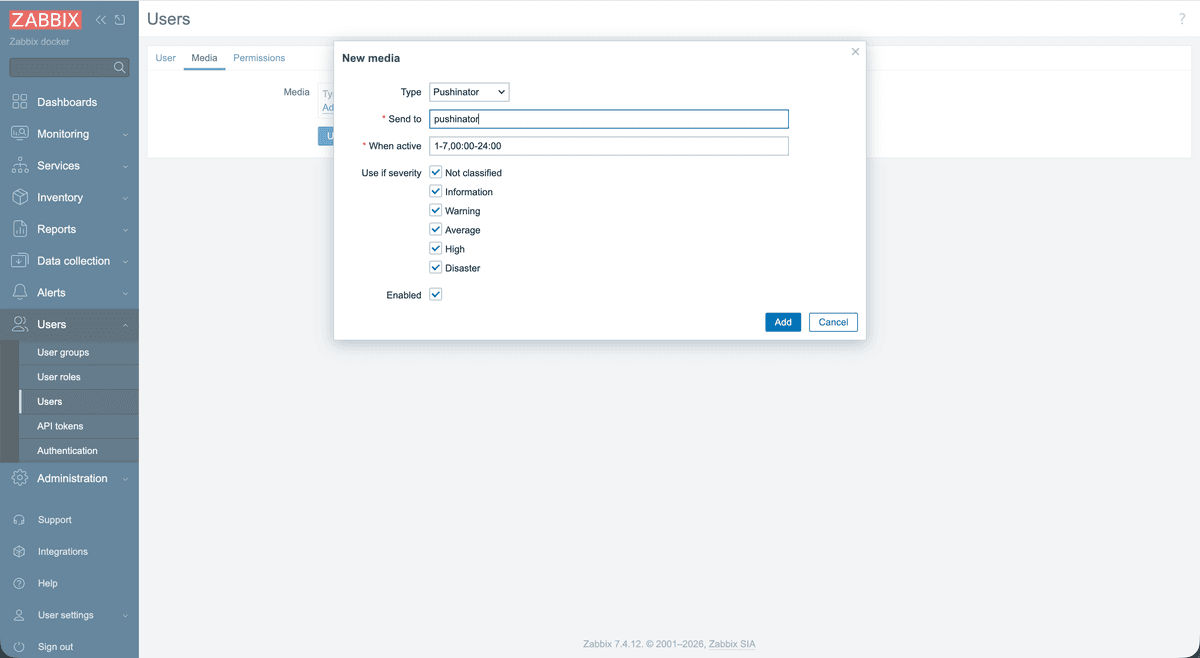
Route problems to it
Create or edit a trigger action under Alerts → Actions → Trigger actions. Add any conditions you want (e.g. severity or host group), and under Operations, add Send message to users, pick the user you just configured, and restrict Send only to to your new media type so it doesn't also fire your other configured media.
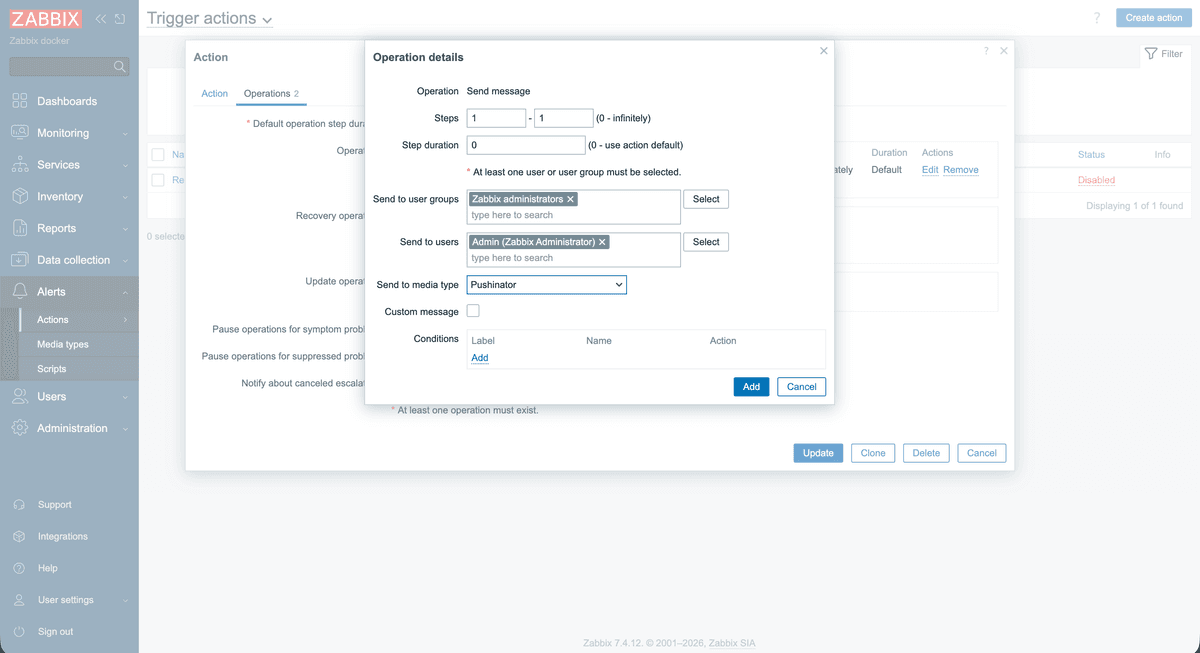
Subscribe your devices
Install the Pushinator app from the App Store or Google Play, then scan your channel's QR code to subscribe. From now on, problems and their resolutions arrive as push notifications, e.g. "Zabbix Alerts | 🔴 PROBLEM: High CPU load on web-1 (High)".
Need help?
Drop us a message at [email protected], and we will try our best to assist you. Feel free to request a feature or integration, or let us know if there are any issues on our side.